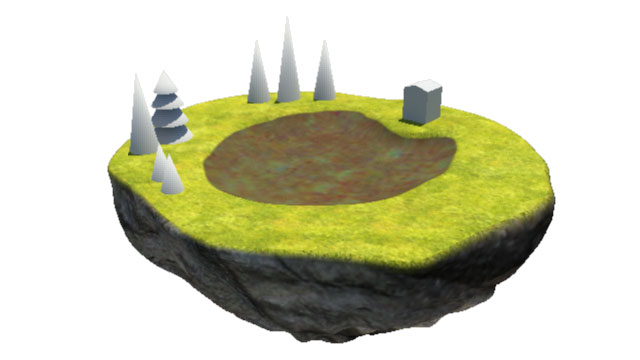
In this post I’ll cover how to blend tiled textures between polygon edges using my floating island as an example. If you take a look at the render below, I’m talking about how the tiled grass texture blends into the tiled rock and dirt textures.
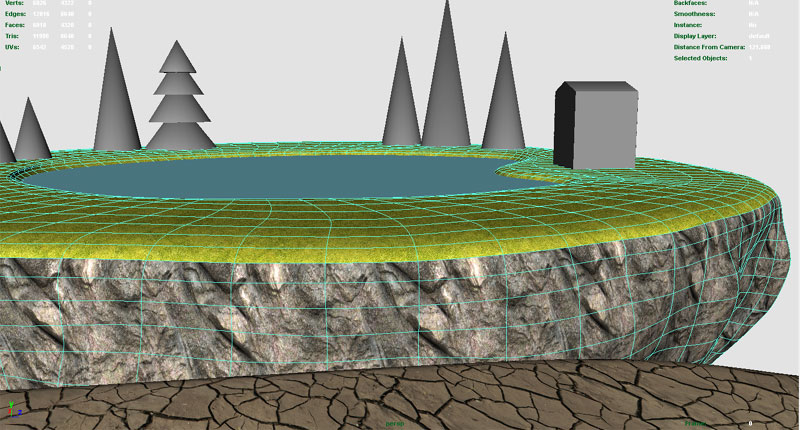
Below is the model of the floating island. Rather than creating a holistic UV map and a heavy texture map, I wanted to tile grass and rock textures, but have them blend into each other rather than have a clear cut line between adjacent textures.
First, I laid out the UVs so they are contained within the first quadrant with no overlapping UVs. Just like I would to make one texture map for the whole island.
In Photoshop, I created one layer per material (in this case 3: one for grass; one for rock; and one for dirt.) I blacked out the layers, then painted white over the areas I want the materials on.
Since there are only 3, I decided to put each layer on a channel layer like below.
So the white area on the Red Channel will be tiled grass, the white area on the Green Channel will be tiled rock, and the white area on the Blue Channel will be tiled dirt. The edges are blurred so the final textures will blend into each other.
Back in Maya, a new LayeredTexture node was created by clicking on its button on the sidebar of the Hypershade window. The lge_island_texture node is the lambert material on the island mesh.
I clicked on the new LayeredTexture1 node to open up its Attributes Editor. Then clicked on the area under the Layered Texture Attributes section twice to add 2 more textures. I picked 3 colours for the 3 materials, and changed their Blend Modes to Over. These colours will be replaced by textures later.
A new Lambert material called RBG_isle was created. The RBG map I created above was attached to its colour node. Then I deleted the material node.
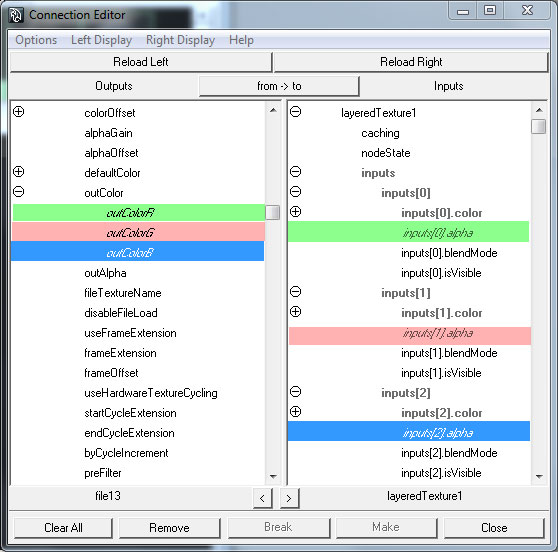
The RBG file node was middle-mouse-dragged onto the LayeredTexture node. Other was selected when the menu popped up when dropped onto the LayeredTexture node. This pops open the Connection Editor.
I clicked on outColorR on the left column, then clicked on inputs[0].alpha on the right column.
Likewise, ourColorG was connected to inputs[1].alpha, and outColorG to inputs[2].alpha.
Finally, I middle-mouse-dragged the LayeredTexture node onto the material on the island mesh, and selected Color. The ‘final’ network looked like this.
You can see this working in the preview panel if you have the High Quality Render switched on.
Now to replace the colours with textures, I clicked on the Colour button in the Layered Texture Attributes Editor to attach the texture files just like I would for any material.
This was done for all three textures and the network looked like below.
A quick render showed that it worked well :)
In the place2DTexture node, Repeat U and Repeat V could be can to increase the number of tiles.
To connect blended bump maps, normal maps and displacement maps, another LayeredTexture node needs to be created. The process is the same as above, but instead of hooking it up to the Colour attribute of the material, you hook it up to the relevant slot (in this case, a normal map for the rock was connected to the Bump slot).
The final render using a layered texture with tiled textures, another layered texture for normal maps, and another for displacement map is below.


Hi, may I ask if the RGBcolours is saved as a jpeg file or a psd file? Thanks :)
Hi Estee,
The RGBcolour texture file was saved out as a jpeg before using it in Maya :)
Thanks Kakes! Would you mind explaining how did you go about adding the gamma correct node? I am totally confused with the connections! Really appreciate your time in replying my message! (:
Hi Estee,
For gamma correction, check out my earlier post:
https://kakes3d.wordpress.com/2010/10/23/gamma-correction-for-physical-sun-and-sky/
Kakes
Thank you so much for your prompt reply Kakes! I will try working it out now. Thanks for being such a great help! Looking forward to more of your works and tutorials. (:
Hi Kake,
I am new at unwrapping UVs, and I was wondering for this island, is the best way to unwrap it by doing a cylindrical unwrap for the bottom, and plane projection for the top?
Thanks!
Hi Kakes,
I can’t figure how you turn the 3 layers of black and white into the channel format, how to I load each layer into a separate channel?
Thanks
hi kake,
i can’t found bump map link to layertexture you can show detail to bump map connect layertexture node ?? plz.