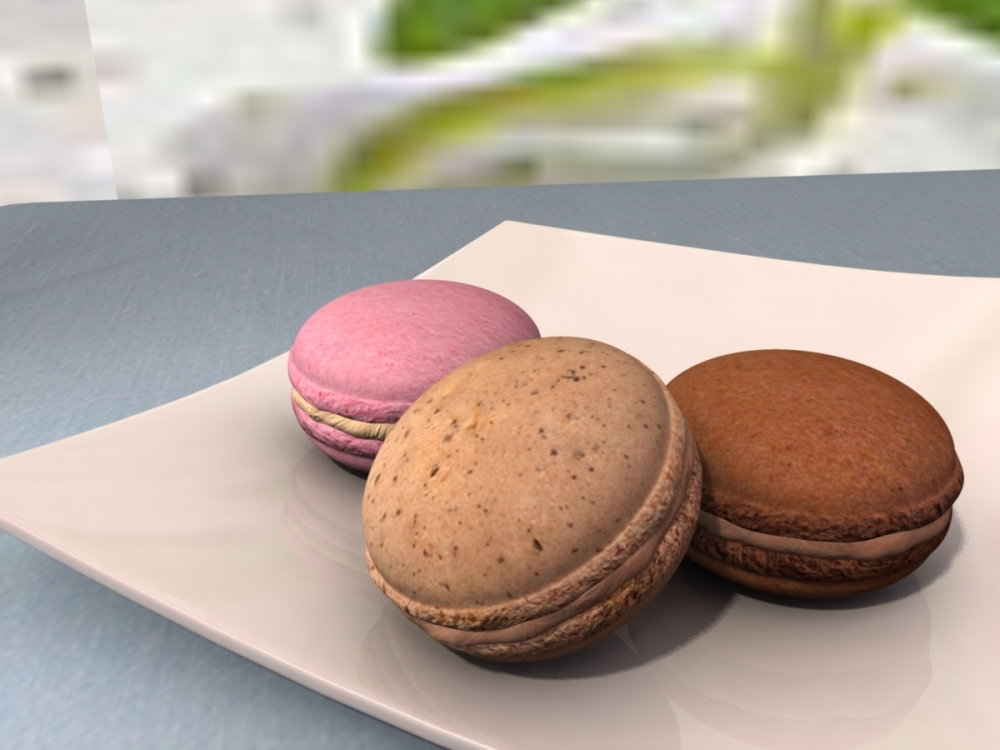
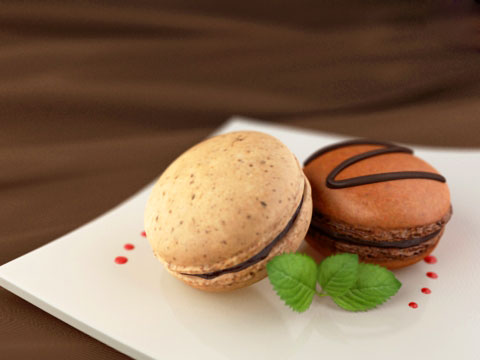
In this post, we’ll see how the image below changes as Depth of Field parameters are altered. We’ll then take a look at smoothing the depth of field, as the default maya DoF makes the render look very grainy.
Tweaking DOF parameters
If you select a camera and open up the attributes editor, you’ll see that there is a Depth of Field tab. Expand that tab and check Depth of Field to turn it on.
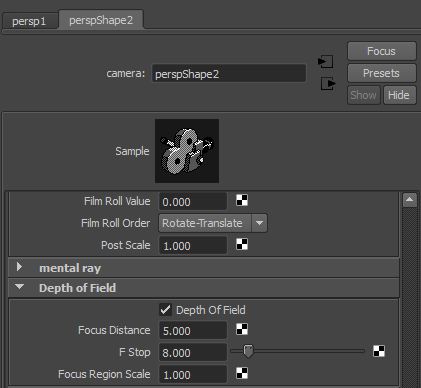
For the Focus Distance, set that value as the distance of the subject from the camera. You can find that out by going to Display –> Heads Up Display –> Object Details and selecting the object while viewing through the camera; the distance appears in the top right corner of the viewport in green. In this case, the distance of the front macaroon from the camera was 5.693 so I set the Focus Distance to 5.
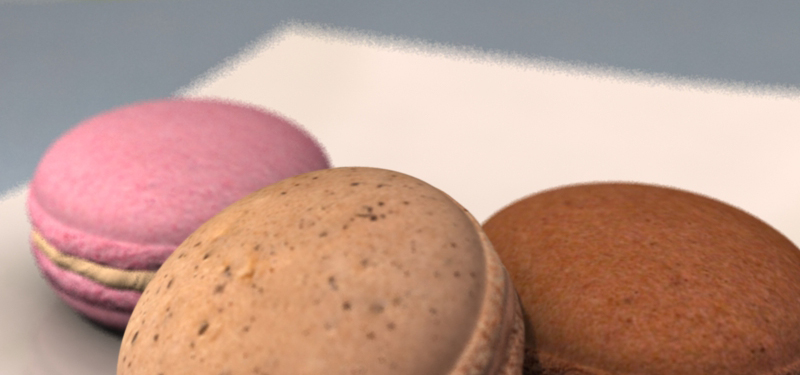
Keeping the Focus Region Scale value of 1 and F Stop at 8, the render turned out like below.

Increasing the F Stop value makes the background not blur as fast. This was a bit of trial and error for me. But I take it as; the smaller the value, the faster the camera blurs beyond the focus distance. Increasing the F Stop value from 8 to 20 made the render look like below.

Increasing the Focus Region Scale to 2 lessens the blur behind the focus distance.

Smoothing the DOF render
The default Depth of Field renders out quite horribly; the blurring is very noisy. Increasing the anti-aliasing in render settings doesn’t help much neither.
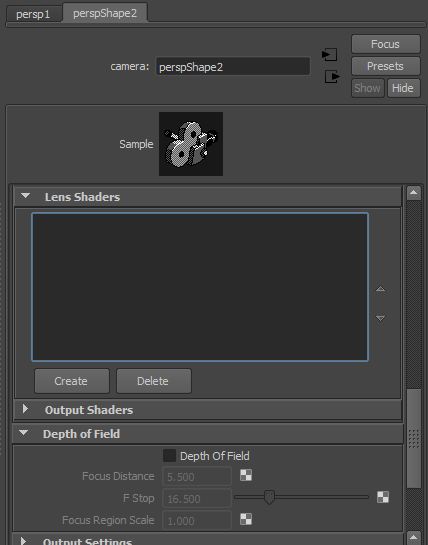
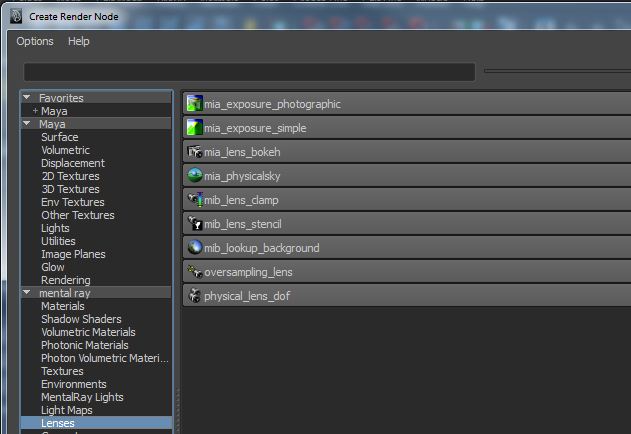
A great way to fix this is to create a Lens Shader in the camera attributes.
When you hit on Create in the Lens Shader section of the camera, select physical_lens_dof.
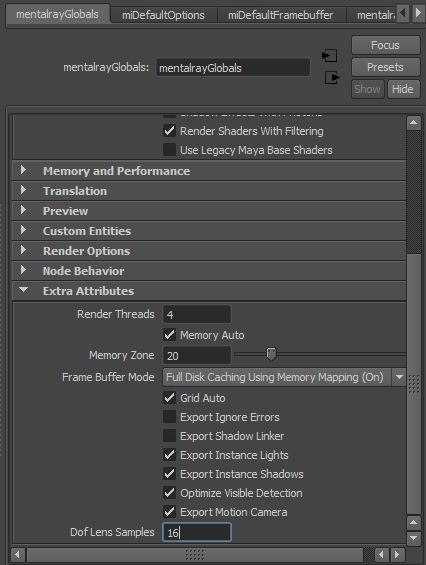
Enter the Mel script “addAttr -ln "dofLensSamples" -at "short" mentalrayGlobals“.
Then type “select mentalrayGlobals” in the Mel script area so it shows up in the attributes window. Increase the Dof Lens Samples. This smooths out the depth of field blurs.
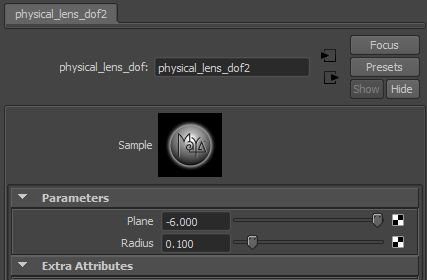
The default Plane parameter value was -10, which rendered out like this.

By changing the Plane value to -6 (which was approximately the negative of the Focus Distance), the render focused on the front macaroon again.

Compare the difference below. Left is what it looked like before with the default Maya depth of field, and the right is after the lens was created and samples were increased.

It’s definitely looking less grainy, but it did involve quite a lot of trial and error. Share your method of applying DOF.

Very well explained!
Hi, I was wondering if you may help me? :) Where do i add in the mel script? :( supposedly I tried and its not working for me.
Thank you. I hated the way the DOF on he camera worked. It was frustrating me getting a good render. I am happy now
where do you add in the mel script? :( Im super confused in that one area.
in maya 2014 it is in a little box down at the bottom of your screen, under the timeline, not sure if this is the same on other versions, since I am new to maya
Hello, I’m trying to add the lens, but my Lenses tab only has 3 shaders to pick from and the one used in this tutorial is not listed. Any ideas on how to get it into my shader list?
I had the same problem. go to:
CameraShape/mentalray/Lens shaders/create/legacy/physical_lens_dof.
Very nice, ill deffinitely try this tonight, thanks for the tutorial :)